May 31, 2012

Making Ice Cream and Fussy Eaters


I am half way through making ice-cream without an ice-cream maker this time.  I saw a technique on using a food processor on Pinterest (of course).  The delectable image above however is from A Cup of Jo, also made without an ice-cream maker.

Sarah Jane


On a food related note, I am over half way through this book which is fabulous so far.  Really interesting to learn about how the French view food education and food as a culture in general.  More importantly, I hit a turning point the other night night when I completely identified with one of Karen's experiences when she first tried to tackle her tricky food situation at home (chapter five). 

It was a timely intervention on our nightly meal times, I have been using number six every night since first receiving the book but having quite a battle to get Anya, who is my painful eater, to even comply to tasting.  So, the last few nights we have focused more on basic table manners and pleasant family conversation, I still say "the mantra", #6  but don't push it.  I have also gone back to involving the kids in food prep (I stopped when number two came along) and I have to say it has been quite enjoyable.  Josiah is happy cutting up the stalks of something with the 'plastic' knife while Anya gets to use a real knife - eeek!  She is doing very well under much supervision!!   Anyway, if you have any challenging eaters in your house... this book might be for you too!


May 29, 2012

Renovation Show: The Block 2012

 Did you like Sophie and Dale's idea last night on The Block?  I don't watch it much but love a good room reveal.... if only they could cut the rest of the crap.  I thought S&D did well to get so many thrifted suit cases the right size!  I hadn't seen this idea either so while I am not sure how practical it is, they do look great and original.

I adore the exposed brick wall, especially with the other elements they have included in this hallway - the fabulous Coconut Beads in black pendant from Grant Dorman Interior Products makes this space, love, love!!

The other space I really liked was Brad and Lara's.  It looks like they kept true to the original plasterwork in the hallway. 

This product shot doesn't do the pendant justice but it was really lovely and again, made the hallway (theirs was white).  The light is the Fandango lamp from Hermon & Hermon.  The block website has supplier lists on all the rooms - handy!

I enjoyed this colour palette too.  The wall art could have had more pop I thought to blend in with the bed colours but overall I would be happy sleeping here, fresh and calm.

May 28, 2012

Sarah Jane Fabric Collection #2

Following the great success of Children at Play, Sarah Jane is releasing a second line of fabric through Michael Miller called Out to Sea.  You will have to wait until August to get your mitts on it though.

A really cool line for children - with three different colour palettes. I am hanging to see what Sarah's quilt fair booth looked like this year as last years showed a LOT of hard work.  More photos of the fabric on Sarah's blog.
Photos courtesy of Sarah Jane.

May 25, 2012

Geometric Paper Folding: Installation

In the quest to be different from everyone else's wedding brides and grooms seem to go to great extremes to get amazing backdrops to be married in front of.  I'm not really complaining, I love soaking in the creativity and seeing so many cool ideas.  In my humble opinion, the creator needed to paint his metal brackets white on this wooden frame?!?!!!
This couple met at a newspaper so choosing paper as their theme made sense.  The bride and groom enlisted artist Matthew Parker to make this paper installation for them after being inspired by the book Creating With Paper” by Pauline Johnson.  You might recognise Matthew's work from the Design sponge book tour!
 

Lets not hate on photo booths - I think they are still valid, they handsdown beat a boring table shot and give everyone a laugh!    Photos by Jenny Jiminez via Ruffled.

May 23, 2012

Fabric Designer: Leanne Culy

Rata Gisborne Red
Gorgeous fabrics from New Zealand based artist, Leanne Culy for her company Homebase Collections.  Leanne's interpretation of New Zealand imagery has been screen printed onto a mix of hemp and cotton cloth.  Beautiful for sewing projects and home decor projects.


Swans Taupo
Tutu Gisborne Tapa 
Hoki Gisborne Green
This Hoki is my personal favourite, looks like a fern although a Hoki is a fish?!  You HAVE to check out her holiday house to rent... it made me salivate... along with the woodfired pizza, mmmmm.

All images courtesy of Brian Culy

May 22, 2012

Wiksten Tova

Here is my completed Wiksten Tova!  I ended up cutting an inch or so off the bottom as the length didn't suit my shape.  This fabric was meant for something else back in February but as soon as I bought the Tova pattern it was re-assigned - I never wear patterns on my top half.  So comfortable to wear. 

I am in between sizes but chose to make a small and it was perfect for me aside from the length.  It is a little roomy in the back and I may consider adding a couple of darts but for now it is only been worn under cardigan's etc because it is so cool here.  Loving the Tova!  Thanks Jenny :-)     


I also made the tank with sleeves.  It gets lots of wear but I do wish I had of made the hems wider as they roll constantly, it may help if I ironed the shirt but who wants to iron knits!! 

May 21, 2012

Thrifted Silk Outfit to re-fashion

I thrifted this 100% pure silk number over the weekend at an senior centre's fete.  I envision a breezy tank top for me sans the bling... they might become a hair piece or two....

The skirt is also silk but I am not sure what I will do with it as yet... I think a dress up for Anya will be the end result.  It has full pleats on the bottom too.  What a find... for $10 I can have a go and I won't be too sad if it doesn't work out.  The weaving would look cool on a clutch actually!  These are the styles in my head for a top!  The back of the top has press studs down it.
Anthropology
Wiksten Tank
Penelopes
Let me know if you have any suggestions!  What a fun project this will be... and how happy am I hubby is home! woooooooohooooooooooooo

May 18, 2012

Cool Retail Installations

Artist Jessica Pazalla is the talent behind Bramble Workshop!  Jessica has degrees in studio art and fine sculpture and worked on some of these amazing installations for Anthropology among other projects.

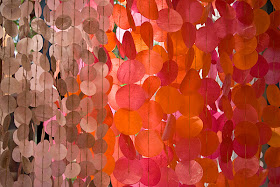
The translucent circles in this dot window are made from tissue paper but cleverly ironed with wax in between two circles.  A lot effort but with striking results.

Made with tape... such an effective backdrop, also used in the creative collective office.

Made for Hermes window, an oceanic paper mache display.  Hand cut painted pieces of paper form these rolling sculptures which represent the flow and currents of water.  Hoorah for Friday!  Enjoy your weekend.

All images courtesy of Bramble Workshop

May 16, 2012

A Creative Space


Hubby is in New Zealand for business for the week so I am just trying to keep afloat around here along with working on custom orders etc...  I did however manage to do some browsing... as you do... and came across this fabulous office tour!  Not your usual office either...  a creative space for creative people!  Love the lockers although they need a splash of colour and my next favourite thing ever...


These made me "ohhhh and Ahhhh" out loud!  I'd love to give something like this a red hot go in my own design.  I'd maybe paint in a neon or happy colour and arrange in a cluster. We like simple but effective design around here..

Images: Bethany Nauert
Crystal Installation: Bramble Workshop

May 14, 2012

Must see Movie...ONCE

Sometimes there are movies that come along and make such an impression, they stay with you for a long time.  Once was one of these movies.  Particularly the music!!!  It's all about the music. 

The musician/actors pictured, Marketa Irglova and Glen Hansard wrote and sang all the songs in the movie which went on to win an Oscar in 2007 for Best Original Song.  It is a bit quirky, understated and I loved it even more for the unknown actors, un-polished, low budget feel.  Put it on your must watch list if you haven't already seen it!! 


May 11, 2012

New Designer Find: Depeapa


I found a lovely new shop on Etsy,  DepeapaVerĂ³nica de Arriba is the talented illustrator behind these lovely pieces and currently resides in Spain.   Her work has been featured in Frankie a couple of times and you can see why!  Happy Mothers Day mothers!!


May 10, 2012

Fresh Flower Inspiration

Gardenia
I missed my macro lense when taking these but got some pretty inspiration from my Mum's garden regardless!
Camellia
So many different variations of Camellia's.  They really are so pretty.  I thought these pink ones below were Camellia's but they are Gordonia's apparently.

Not sure what this is but it is pretty and such a great colour. Let me know if you know it!  I'd love to break these all down and recreate in paper.

Ed note:  The blue is called Salvia.  Thanks Nat.

May 9, 2012

Canberra Etsy Seller: Handmade Hair Accessories


Did you know Etsy has a new Wedding section complete with a bridal registry?  It makes sense as they offer so many unique goodies many bride and grooms would want to lay claim too.


Speaking of wedding goodies, the above pieces are newly listed in my Etsy store.   I think goose feathers are my favourite to work with (these are the fatter ones), the skinny ones are Ostrich.  These pieces are available as a custom order in other colours on request and aren't restricted to weddings!

May 8, 2012

Mothers Day Flower Chrysanthemum: Paper Flower DIY

As promised, with Mothers Day just around the corner I thought I would give you a quick and easy Tutorial using coffee filters.  These are my take on the old fashion 'Mum' as they are known or the Chrysanthemum.

Materials and Tools
  • Approximately 12 large coffee filter papers
  • Floristry wire
  • Parafilm (floristry tape explained here), green if you want the realistic stem, alternatively - use white
  • Paper scissors for filters only
  • Garden scissors or wire snips for the wire
First step is to cut your templates from the coffee filter papers, smooth them out with your hand then fold in half, quarter and again.  Depending on how thick you want your petals to be or what shape you want them in. 

Cut around the corners to shape your petal on all twelve filter papers.
Step two, make your petals:  Fold all filters out flat, leaving one aside for the base.  Take the remaining filter papers - make one petal at a time by folding the filter in half and then roll around to get your curved petal. 


Take a wire and lie it against the back base of your petal, giving one side a shorter tail. Pinch together and then wrap around.

It is a far easier way to manipulate the flower petals when constructing a flower rather than gluing your paper together.  The wires also form your stem so you don't have to use a stick.
 

Step three, once all your petals are made wrap the wire stems in parafilm.  Pull the tape from the roll and ease it gently onto the bottom of petal base to cover the wire, working your way half way down the stem, stretch and wrap as you go.

Step four, assemble flower - take one petal and put in the middle to use as your base (I used two filter papers to make a thicker inside petal), add the next four around then another layer until you have used all your petals. Squeeze stems of petals together as you go, the parafilm will make them stick to each other.

Trim stems to desired length with garden scissors or wire snips, then wrap the whole bunch of stems in parafilm to neaten.  This is where a florist would then bound the stems in ribbon to complete a wired 'bouquet', but for our paper flower we will add the backing petal. 
Take the last filter you set aside and cut a hole on the middle (easiest to snip when it is folded up ready to cut petal shapes). Poke the flower stem through the last filter paper and dab a few dots of glue.... (shhhh).... to the open filter so it sticks to the base of your petals and hides the mechanics. 

Ta daa!! You're done, give as a gift, make bigger or smaller, use cupcake wrappers for individual flowers (I would then use a 24 or 26 gauge wire), use them as a table centre, a gift topper, dye them... you're only limited by your imagination.  Enjoy!